
Roof Flashing: Why Transitions Matter
Most homeowners notice the shingles first. However, some of the roof’s most important details are found where the roof meets another surface.
Flashing protects areas such as walls, chimneys, skylights, vents, valleys, and other roof penetrations. Water often collects or changes direction at these transitions, so the right materials and installation details matter.
At Handnail Roofing, we evaluate every roof as its own system. We consider the slope, layout, penetrations, existing materials, and selected shingle product before work begins.
What Makes A Complete Asphalt Roofing System?
What Is Roof Flashing?
Roof flashing consists of materials that protect transitions where water could otherwise enter through a joint, opening, or change in direction.
Common flashing locations include:
- Chimneys.
- Skylights.
- Plumbing vents.
- Sidewalls.
- Headwalls.
- Valleys.
- Roof-to-roof transitions.
- Other roof projections.
Atlas Pinnacle® Pristine instructions state that installers should put flashing in place before installing the shingles. The instructions identify cap flashing and base flashing for vertical surfaces such as chimneys, skylights, vents, and walls. [Atlas Pinnacle® Pristine Installation Instructions, Section 5]
A professional should select each flashing detail based on the transition it needs to protect and the requirements for the roofing product.
Why Flashing Details Matter
Water does not always enter through the middle of a shingle. It may reach the roof deck at a wall, chimney, valley, or roof penetration.
Missing, damaged, or poorly integrated flashing can put the roof system at risk. Atlas requires installers to place flashing before the shingles and seal it with asphalt plastic cement. [Atlas Pinnacle® Pristine Installation Instructions, Section 5]
The CertainTeed Master Craftsman Manual treats flashing as a separate roof-system component because these areas require their own installation details. [CertainTeed Master Craftsman Manual, Chapter 6]
That is why a proper roof inspection should include more than a ground-level look at the shingles.
Roof-To-Wall Flashing
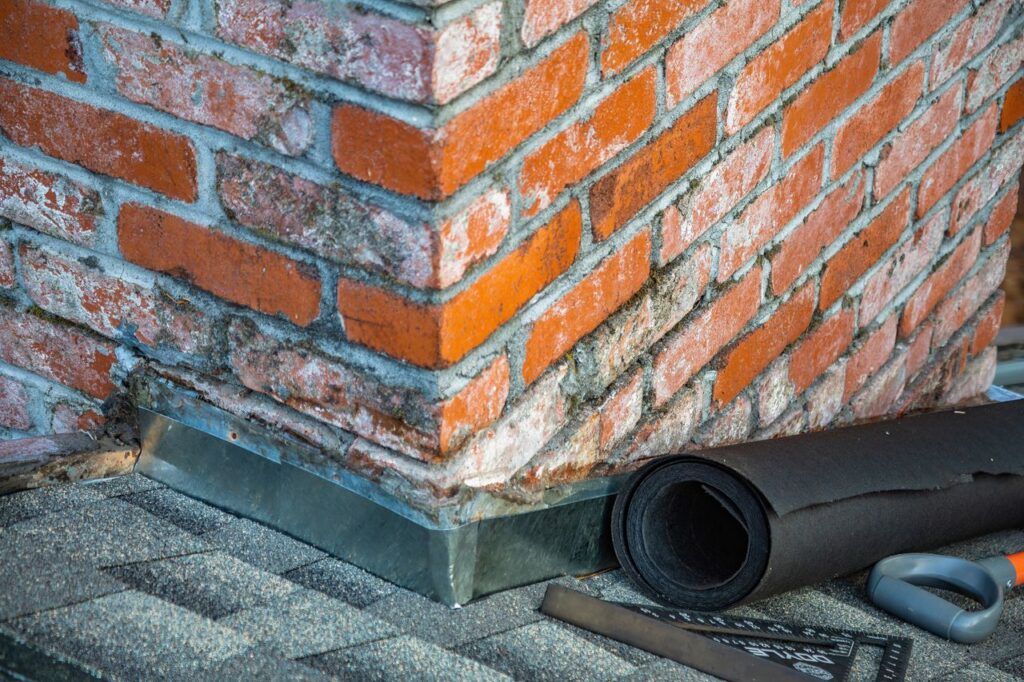
Where a roof meets a vertical wall, water can run toward the joint. Installers commonly use step flashing in these areas and integrate each piece with the roof and wall assemblies.
Owens Corning’s technical guidance addresses step flashing at sidewalls and chimneys. It identifies corrosion-resistant metal and requires installers to follow local building requirements and the applicable product instructions. [Owens Corning Technical Guide and Bulletins, Step Flashing]
The roof and wall coverings must be evaluated together. During a roof replacement, the existing flashing may need to be replaced or adjusted if it cannot support the new roofing system.
Read next: Roof Deck Inspection Before Roof Replacement
Chimneys And Skylights
Chimneys and skylights create larger transitions between the roof and raised structures. These areas deserve close inspection because several materials meet in one location.
Atlas identifies cap flashing and base flashing for these locations. The instructions also require installers to place flashing before shingles and seal it with asphalt plastic cement. [Atlas Pinnacle® Pristine Installation Instructions, Section 5]
During a roof replacement, the condition of the existing flashing should be evaluated. Depending on its material, condition, and construction detail, the flashing may be reusable, repairable, or unsuitable for the new installation.
No single solution fits every chimney or skylight. The existing construction and selected roofing system must be reviewed.
Plumbing Vents And Roof Projections
Plumbing vents pass through the roof covering, so each penetration requires a compatible flashing component.
Atlas lists vents among the vertical surfaces that may require base and cap flashing. [Atlas Pinnacle® Pristine Installation Instructions, Section 5](Atlas Pinnacle® Pristine Installation Instructions)
The GAF Pro Field Guide also includes plumbing vents, skylights, transitions, and other roof projections in its flashing-system guidance. [GAF Pro Field Guide, Section 5](GAF pro field guide.pdf)
During an inspection, the condition of each visible projection should be documented. Damaged boots, cracked materials, exposed fasteners, and poor integration may require correction before the crew completes the roof covering.
Valley Installation
A valley forms where two roof planes meet. Water from both planes flows through this area, so installers must prepare the valley before they apply the shingles.
Atlas states that installers must complete valleys before applying Pinnacle® Pristine shingles. Its instructions address open and closed-cut valleys, including waterproof underlayment, valley flashing, shingle trimming, fastening, and cement requirements. [Atlas Pinnacle® Pristine Installation Instructions, Section 7]
The GAF Pro Field Guide describes several valley methods, including open, closed-cut, woven, and California-style applications. The selected method must suit the roofing product and roof design. [GAF Pro Field Guide, Section 5]
A written estimate should identify the valley method instead of listing “valley flashing” without further detail.
Drip Edge And Flashing
Drip edge protects roof edges, while other flashing components protect transitions and penetrations. Together, these components help direct water away from the roof deck and supporting structures.
Atlas requires corrosion-resistant drip edge at the rake and eaves. The underlayment location determines where the drip edge goes. [Atlas Pinnacle® Pristine Installation Instructions, Section 4]
Owens Corning also provides drip-edge placement guidance and requires installers to follow local building-code requirements. [Owens Corning Technical Guide and Bulletins, Drip Edge Installation Bulletin]
The written scope should identify the materials and installation sequence before work begins.
What Should Be Checked?
Before approving a roof replacement, ask:
- Will the crew inspect existing flashing after tear-off?
- Will the contractor replace, reuse, or repair step flashing?
- How will the crew handle chimney and skylight flashing?
- Which valley method will the contractor use?
- Will the contractor replace damaged plumbing vent flashing?
- Does the estimate include drip edge?
- Which manufacturer instructions will the crew follow?
- Does the written scope explain the flashing details?
- How will the contractor document unexpected conditions?
The Texas Minimum Construction Standards require work specifications to describe what the contractor will install, repair, or replace, how the work will be completed, where it will occur, and the quantity involved. [Texas Minimum Construction Standards, Section 1.11]
A detailed scope gives homeowners a clearer understanding of the work before the old roof comes off.
Experience Makes A Difference
Roof flashing requires more than a one-size-fits-all checklist. The correct detail depends on the roof design, existing construction, selected materials, and current product instructions.
With years of experience, Handnail Roofing understands that each roof has its own transitions and problem areas. We evaluate those details, identify the applicable installation requirements, and complete the flashing work as part of the full roofing system.
If you are considering roof replacement in Montgomery, Conroe, Magnolia, The Woodlands, Tomball, Cypress, or Spring, call Andy at 281-819-6054 or email andy@handnailroofing.com.
Your roof should be evaluated by someone who understands what sits beneath the shingles, not only what can be seen from the ground.
Local Code And Safety Notice
Roofing installation must comply with applicable local building requirements and the selected manufacturer’s current instructions. When requirements differ, the stricter applicable requirement should control, subject to review by the local authority and manufacturer. [GAF Pro Field Guide, Installation Instructions And Local Codes]
Roof work can involve fall, heat, electrical, and structural hazards. Do not walk on a wet, damaged, or steep roof. Qualified professionals should complete inspections and installations using appropriate safety practices.
This article is educational. It does not replace an on-site inspection, engineering evaluation, permit guidance, insurance determination, or review of current product instructions.